Apple Lightning Port on a Samsung Phone
For those who prefer a write-up
(the full video is better imo)
Introduction
So I decided to make an Android phone with a Lightning connector! … I know it makes absolutely no sense to do this. After making the first USB-C iPhone, some people suggested I do the opposite. So ok sure, for fun and as a challenge, and thought it would be a good idea to show it to the world on April 1st, so people wouldn’t get too mad about it.
Now, I know there are iPhone clones running Android out there that were designed from the get-go to have a Lightning port. Those were designed by teams of Chinese engineers, but can a single person like me downgrade a Samsung phone with a Lightning port?
Yes, here’s how.
Right away I knew it would be difficult. The reason is that usually those charging cables have a few protections. The first one is electrical, I mean the cable only outputs power if it is properly plugged in, otherwise you would always create short-circuits. Not fun.
But here it goes a bit further, Apple wants to protect its whole Lightning ecosystem, so when a cable is plugged in, it ‘talks’ to the iPhone and each side verifies that they are certified Apple products. Now the problem comes when I want to plug the cable in an Android phone, well it’s going to send some requests to the phone, but won’t hear anything back. There needs to be something in between.
And that’s big big problem number one. Do I need to crack this verification? Surely someone has already done the heavy lifting for me?
You know they build fake iPhone cables in China, right? Well, that means that there are fake iPhone cable factories somewhere in the simulation. And those factories need a way to test those cables, right? So a very niche company created this board right here, whose whole purpose is to test lightning cables.
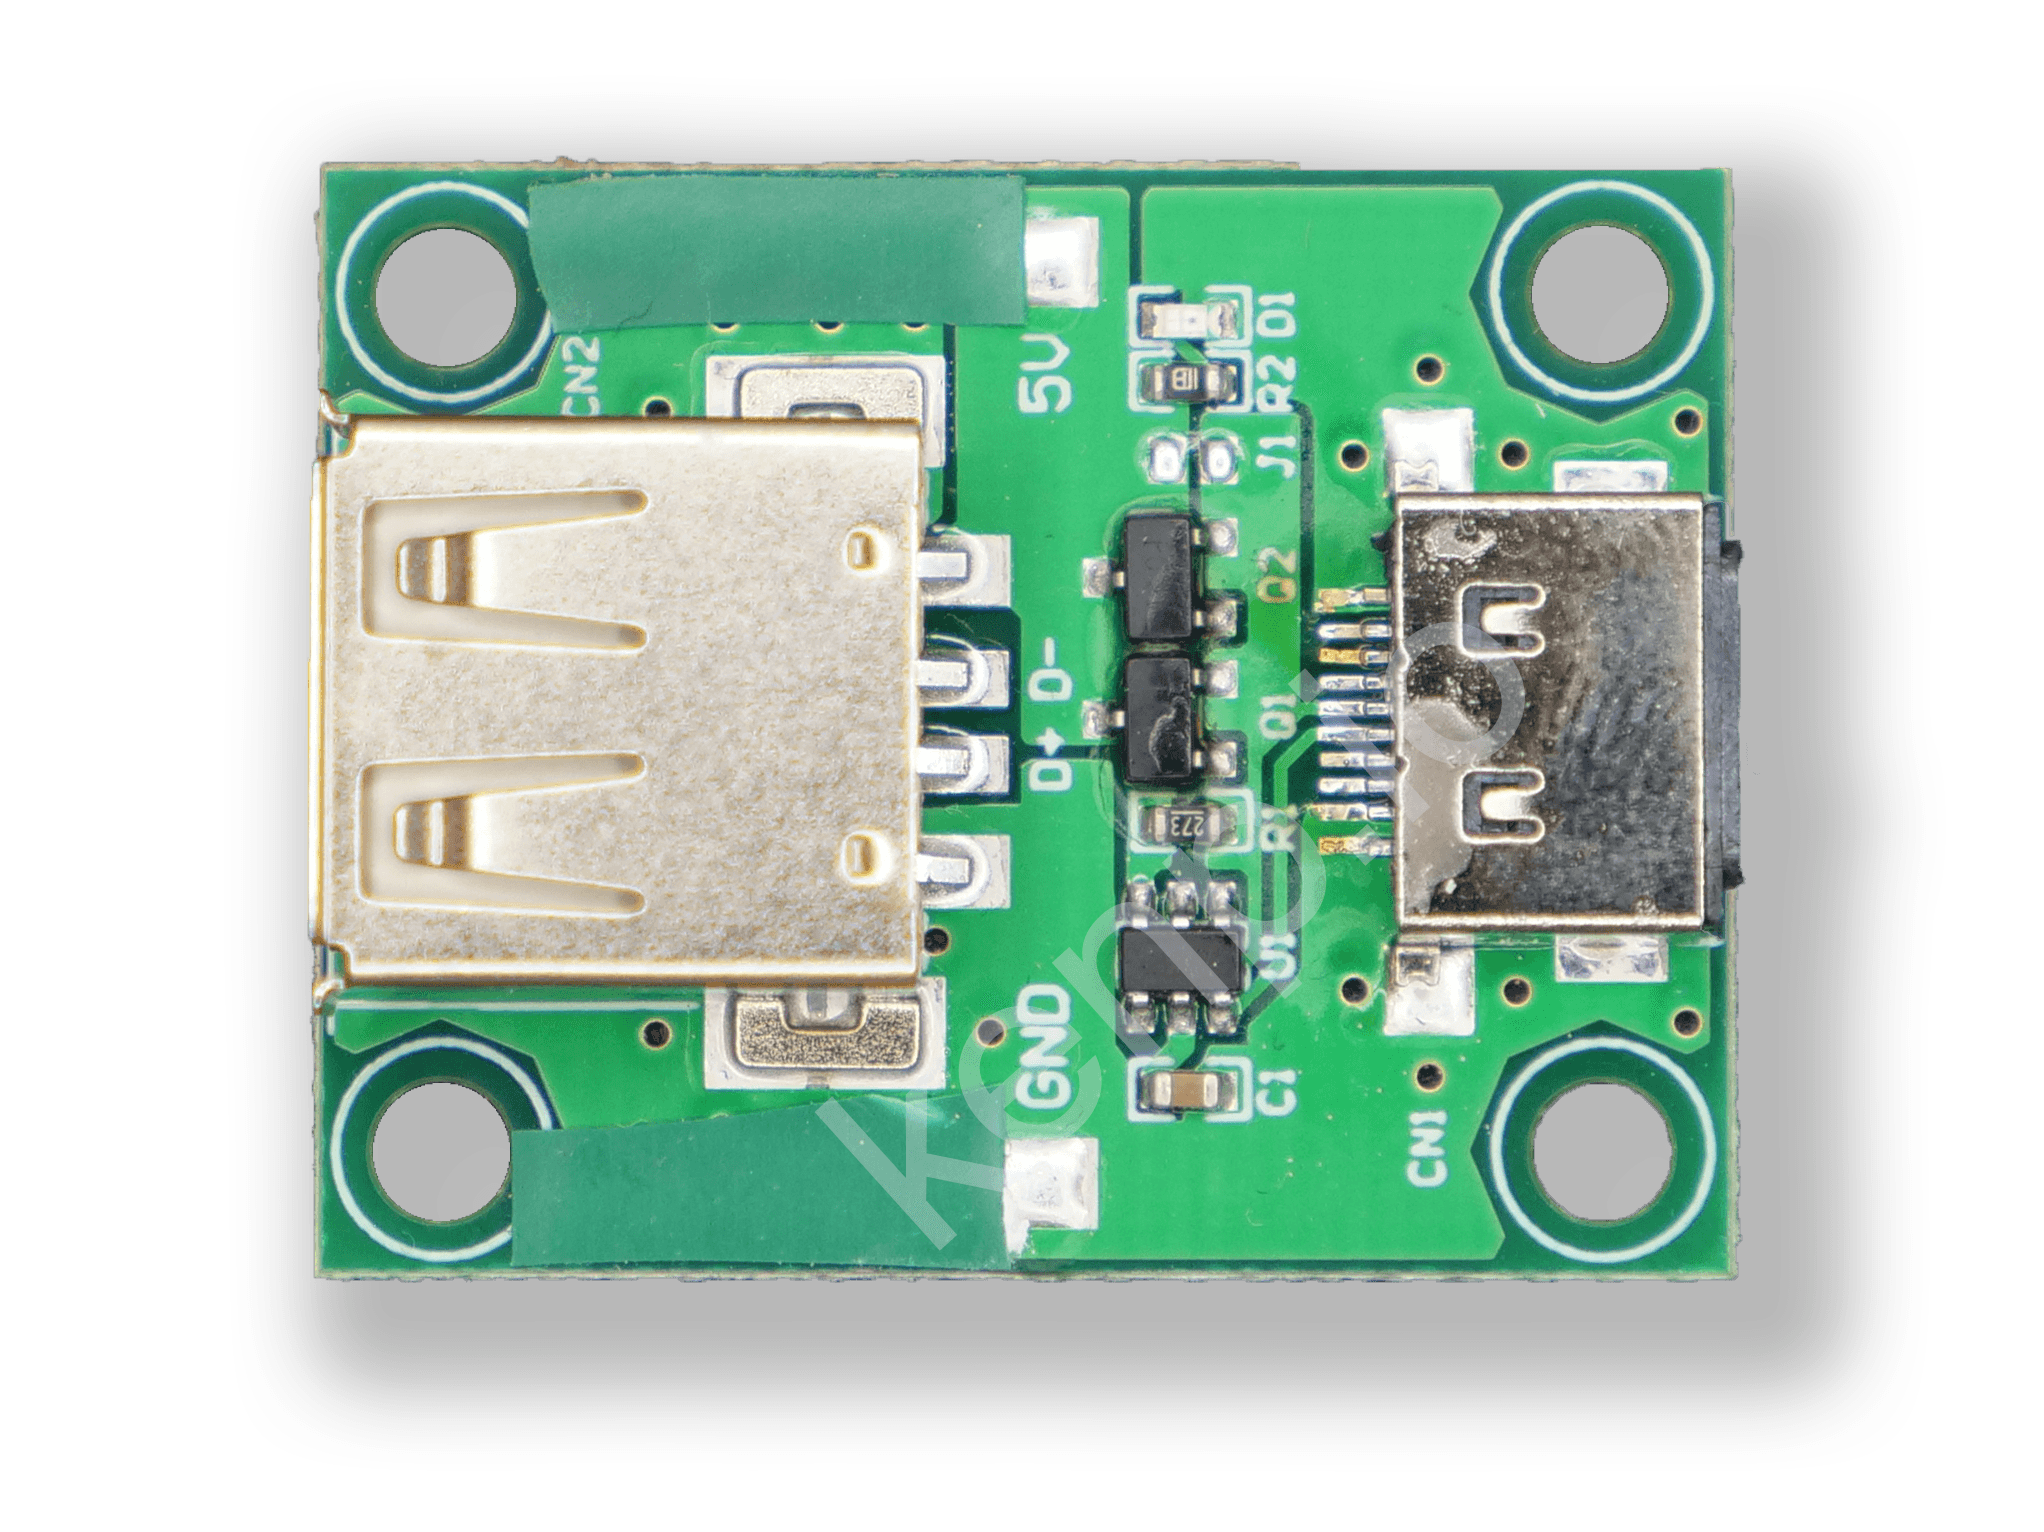
So maybe there is a chip on this board that does exactly what I need, let’s investigate. You can plug in your Lightning cable on the right side of the board and on the left side you can have any USB-powered load. What stops me from plugging an Android phone on the left? Well nothing. So now we know that the phone can be charged with a Lightning cable.
Does data work, though? Doesn’t look like it, but my intuition tells me that maybe it could. On the backside, I see that they ran traces for a USB 2.0 signal. I need to understand this board better.
So I remove all the components and create a schematic of the all the connections.
I see that the data traces I just mentioned are each connected to two pins each on the lightning connector. There are 8 pins in total. That makes absolutely no sense to me, so let me try to fix that. I remove the connector because the traces are hidden underneath, and then I cut off the extra connections using a scalpel. Now the traces are only connected to the correct pin, and I solder the connector back on top. USB is fully working, wasn’t that hard.
So now the electronics work, it’s just a game of micro-engineering. Making the whole thing fit inside the phone.
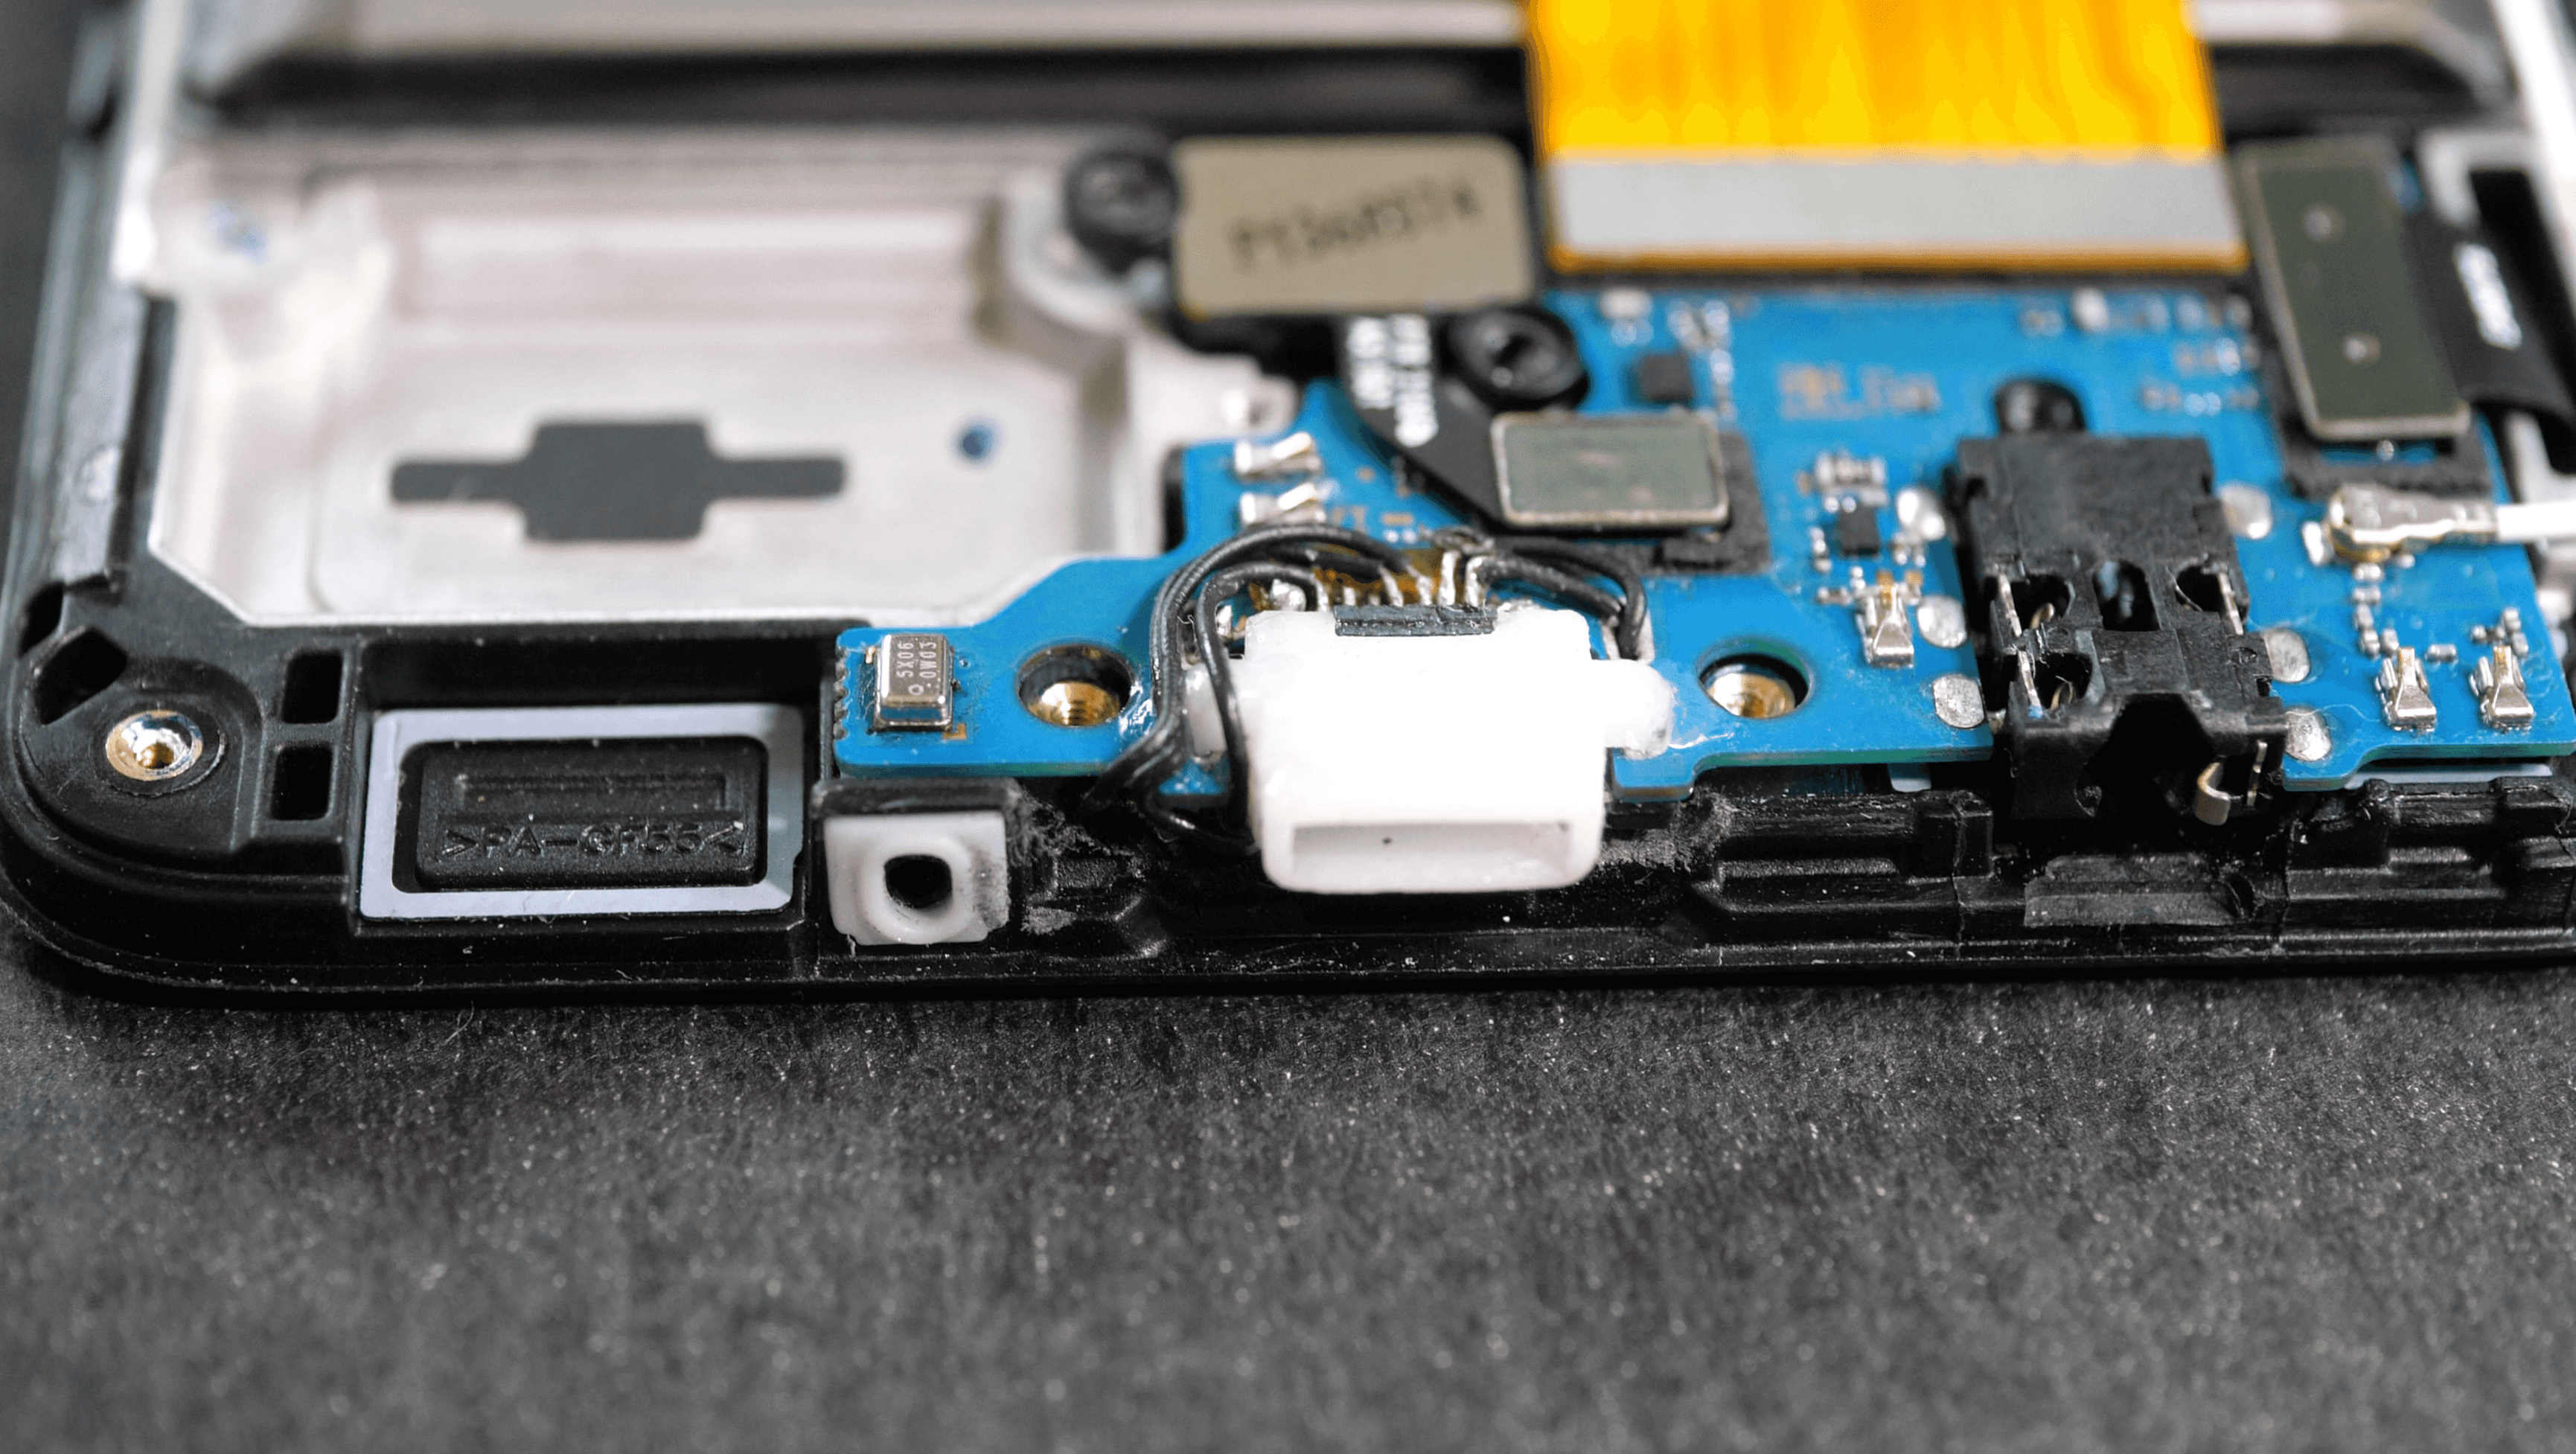
Let’s see what we’re dealing with, I disassemble the Samsung Galaxy A51 I’m working with. I think I’ll see pretty quickly if I have enough room or not.
Ouch, the USB-C connector is absolutely tiny. Who said the iPhone couldn’t have USB-C because it wouldn’t fit? Biggest joke I’ve ever heard. No way the Lightning connector is going to fit because it’s limited by the cutout in the board. Ok major let down, I need to think…
I was working on another project, and I was disassembling a Lightning charging and headphone splitter. And while I was disassembling it, it’s the first time I see such a tiny Lightning connector, I mean everywhere I looked it was always the same size. But this one, well, this one is very small. But still, not small enough… Interestingly, when I pulled on it, I realized that it is made out of two pieces, the first once holding the pins and the second one is just a frame for the pins. Now, I can try sanding this plastic piece down but it’s not going to be great, it’s too small.
Luckily, I recently got my hands on a resin 3D printer, which allows to print super tiny details. Could I make my own custom connector, so that it fits in the phone? You bet.
First things first, I need to recreate the original piece to see if my measurements have the right tolerances. Once that’s done, I can start modifying the shape to keep its main function but shave off as much volume as I can. I went through maybe 6 or 7 iterations and at the end I finally got exactly what I needed. Now I didn’t want to create a custom PCB for this project as nobody will ever use it, so I activate my steady hands mode and get started with soldering the whole circuit by hand with small wires. It took maybe an hour or two. I had to make some extra room, so I sanded some plastic down with a dremel.
To make it short, the first try didn’t work because the components were too thick to close the phone properly, so I had to start all over again. But you know you have to be really patient with these projects, it never works on the first time.
So I closed the phone, and the project was done. It worked. Now it was a super fun technical challenge and I’m relieved that most of you understood that it was kind of a joke for April Fools’ day.
Back to doing serious projects now ;)
Stay tuned, peace!